


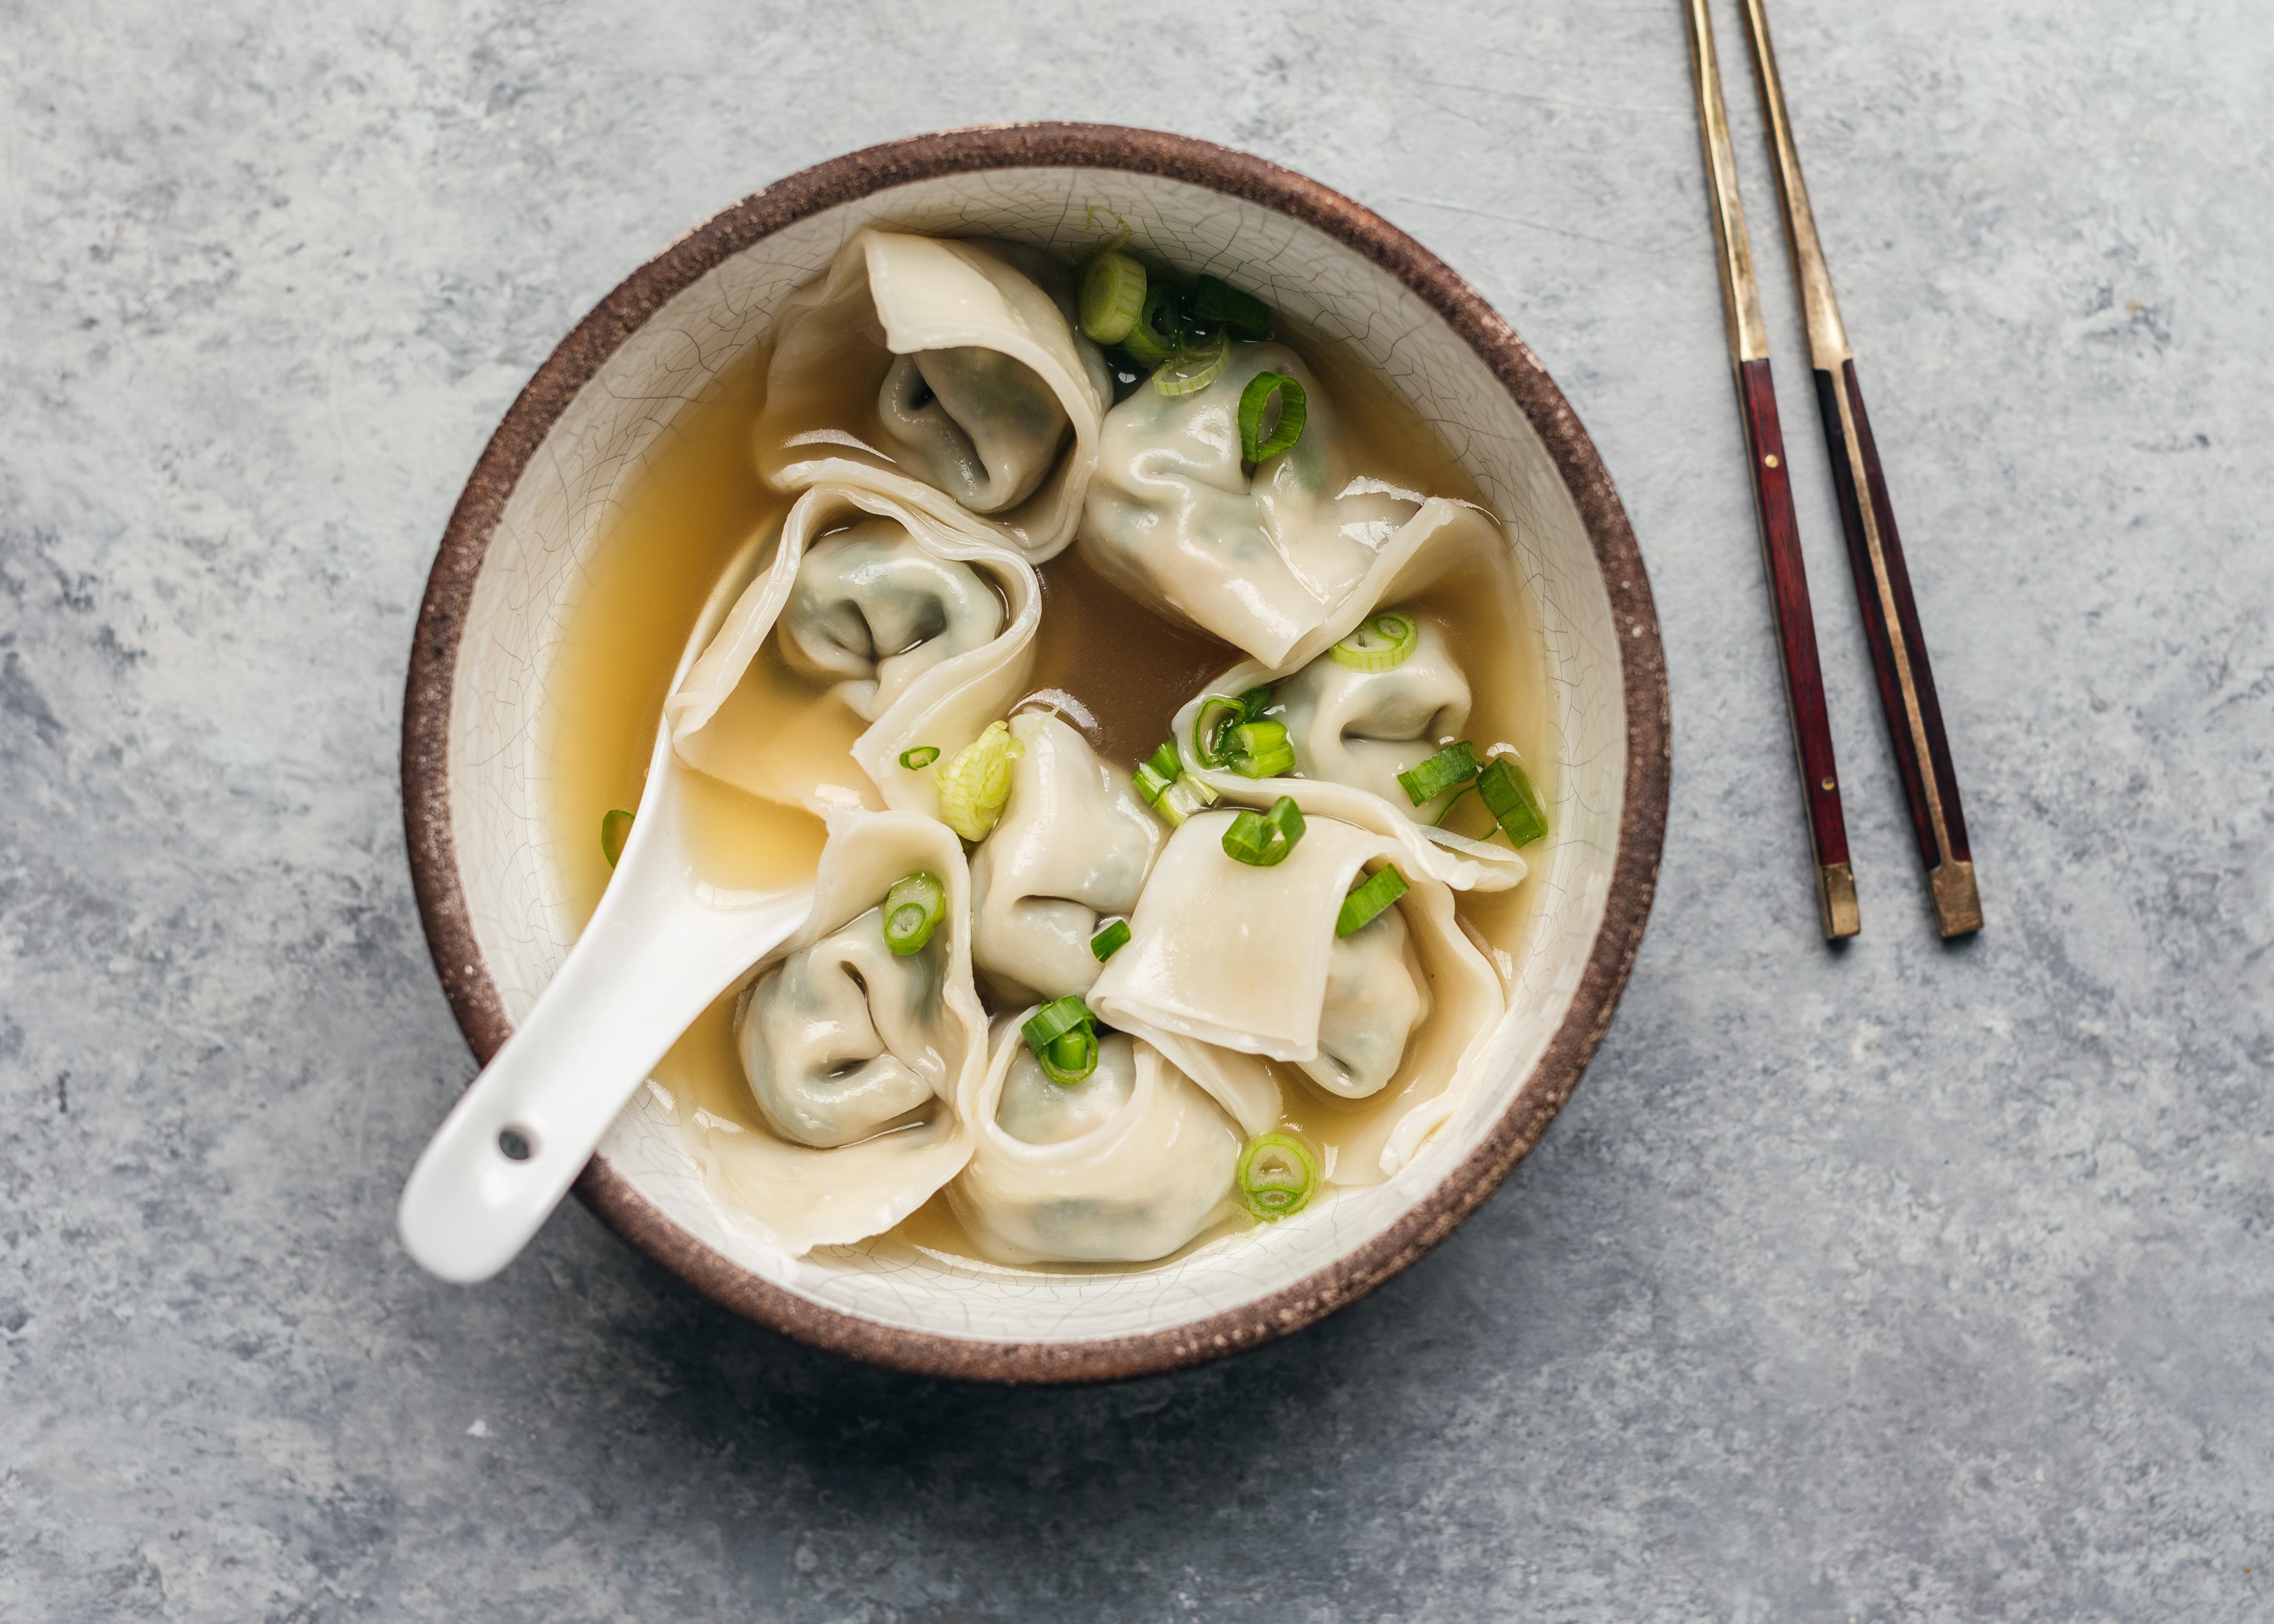
Shanghai Pork and Bok Choy Wontons
aka the best dumplings ever

Hi! You’re a free subscriber of Salty Stacks by Sonia Wong — I appreciate you! If you love my recipes, consider sharing so more people find this newsletter :)
I reckon we’re overdue for dumplings here. I recently shared in a video that I am a monogamist when it comes to dumplings. I have three amazing dumpling recipes on my site but these Shanghai Pork and Bok Choy ones are my ride-or-die.
Bok Choy with its slightly-sweet, vegetal flavour is the best leafy vegetable for dumpling filling. I am completely biased because I grew up on these dumplings and refuse to accept any other fact lol.
Click to view full blog post for Shanghai Pork and Bok Choy Wontons
As usual, I share lots of step-by-step photos and all my Tips & FAQs on the site but I’ll drop the biggest tip here for newsletter friends:
You must squeeze some of the liquid out of the bok choy before using it in the filling. See how much liquid is in bok choy (image below)? We don’t want that in the filling. Why? Because it makes the filling loose and soggy instead of plump and bouncy! This goes for any other vegetable that releases a lot of liquid, such as Napa cabbage.


I find most restaurants don’t do this for their Shanghai dumplings and the result is a loose/wet filling or they use mostly meat and very little bok choy to skirt the issue altogether. Let me know if you agree the next time you order Shanghai dumplings.
Shanghai Pork and Bok Choy Wontons
INGREDIENTS
For the filling:
1 lb (450g) raw ground pork
3 lb (1350g) baby bok choy or regular bok choy
2 tbsp soy sauce
½ tsp kosher salt (increase to 1 tsp if using Diamond Crystal kosher salt)
1½ tsp sugar
3 dashes of white pepper powder
For wrapping wontons:
650g wonton wrappers, 3” square size (about 90-100)
Small dish of tap water for sealing edges
For a super simple dipping sauce:
Equal parts soy sauce and rice vinegar, plus Chinese chili oil to taste
But if you have 3 minutes, make this one > The Best Dumpling Sauce
Optional for serving in a light broth:
3 C chicken stock
Thinly sliced scallions to garnish
INSTRUCTIONS
For the filling:
Preheat large wok or heavy-bottom pot over medium to medium-high heat. Drizzle a tablespoon of neutral high heat oil. In batches, add bok choy and sauté 8-10 minutes or until wilted but not cooked all the way.
Drain bok choy in a large colander and allow to cool while you continue with the rest. There may already be liquid draining out. But just wait, there’s gonna be a lot more liquid to remove!
In batches, place bok choy into food processor. Pulse 20-25 times or until it’s broken down into small pieces. The pieces should be small enough that when combined with ground pork, the filling feels homogenous in your mouth, but don’t puree it into liquid! Look at the blog image for reference.
Once again working in batches, place finely-chopped bok choy into a nutmilk or cheesecloth bag (or wrap securely inside a large doubled-up sheet of cheese cloth or kitchen towel). Squeeze most of the liquid out. This is a CRUCIAL step otherwise your filling will be too wet. If you don't have cheesecloth or bag, press bok choy against the edges of the colander to squeeze out the liquid, aiming to get 80-85% of the liquid out but don’t squeeze to bone-dry because we do want some of that moisture in the filling! As you can see in the website images, there is a lot of liquid in the sautéed bok choy. You’ll likely squeeze out ¾-1 cup of liquid per pound of bok choy.
Add well-squeezed bok choy into a large mixing bowl along with the ground pork, salt, soy sauce, sugar and white pepper powder. Mix well to combine.
Lastly, mix filling vigorously for 5 minutes. This step is to tenderize the meat and pull everything together to form a tighter, more paste-y consistency, which will yield a bouncier mouthfeel when you bite into a dumpling. Your arm will be very tired doing this but don't skip it!
Always recommended for dumpling fillings - taste it! Put a small teaspoon on a dish and microwave it 30 seconds or when cooked through. Eat and adjust seasonings until it is right.
For wrapping:
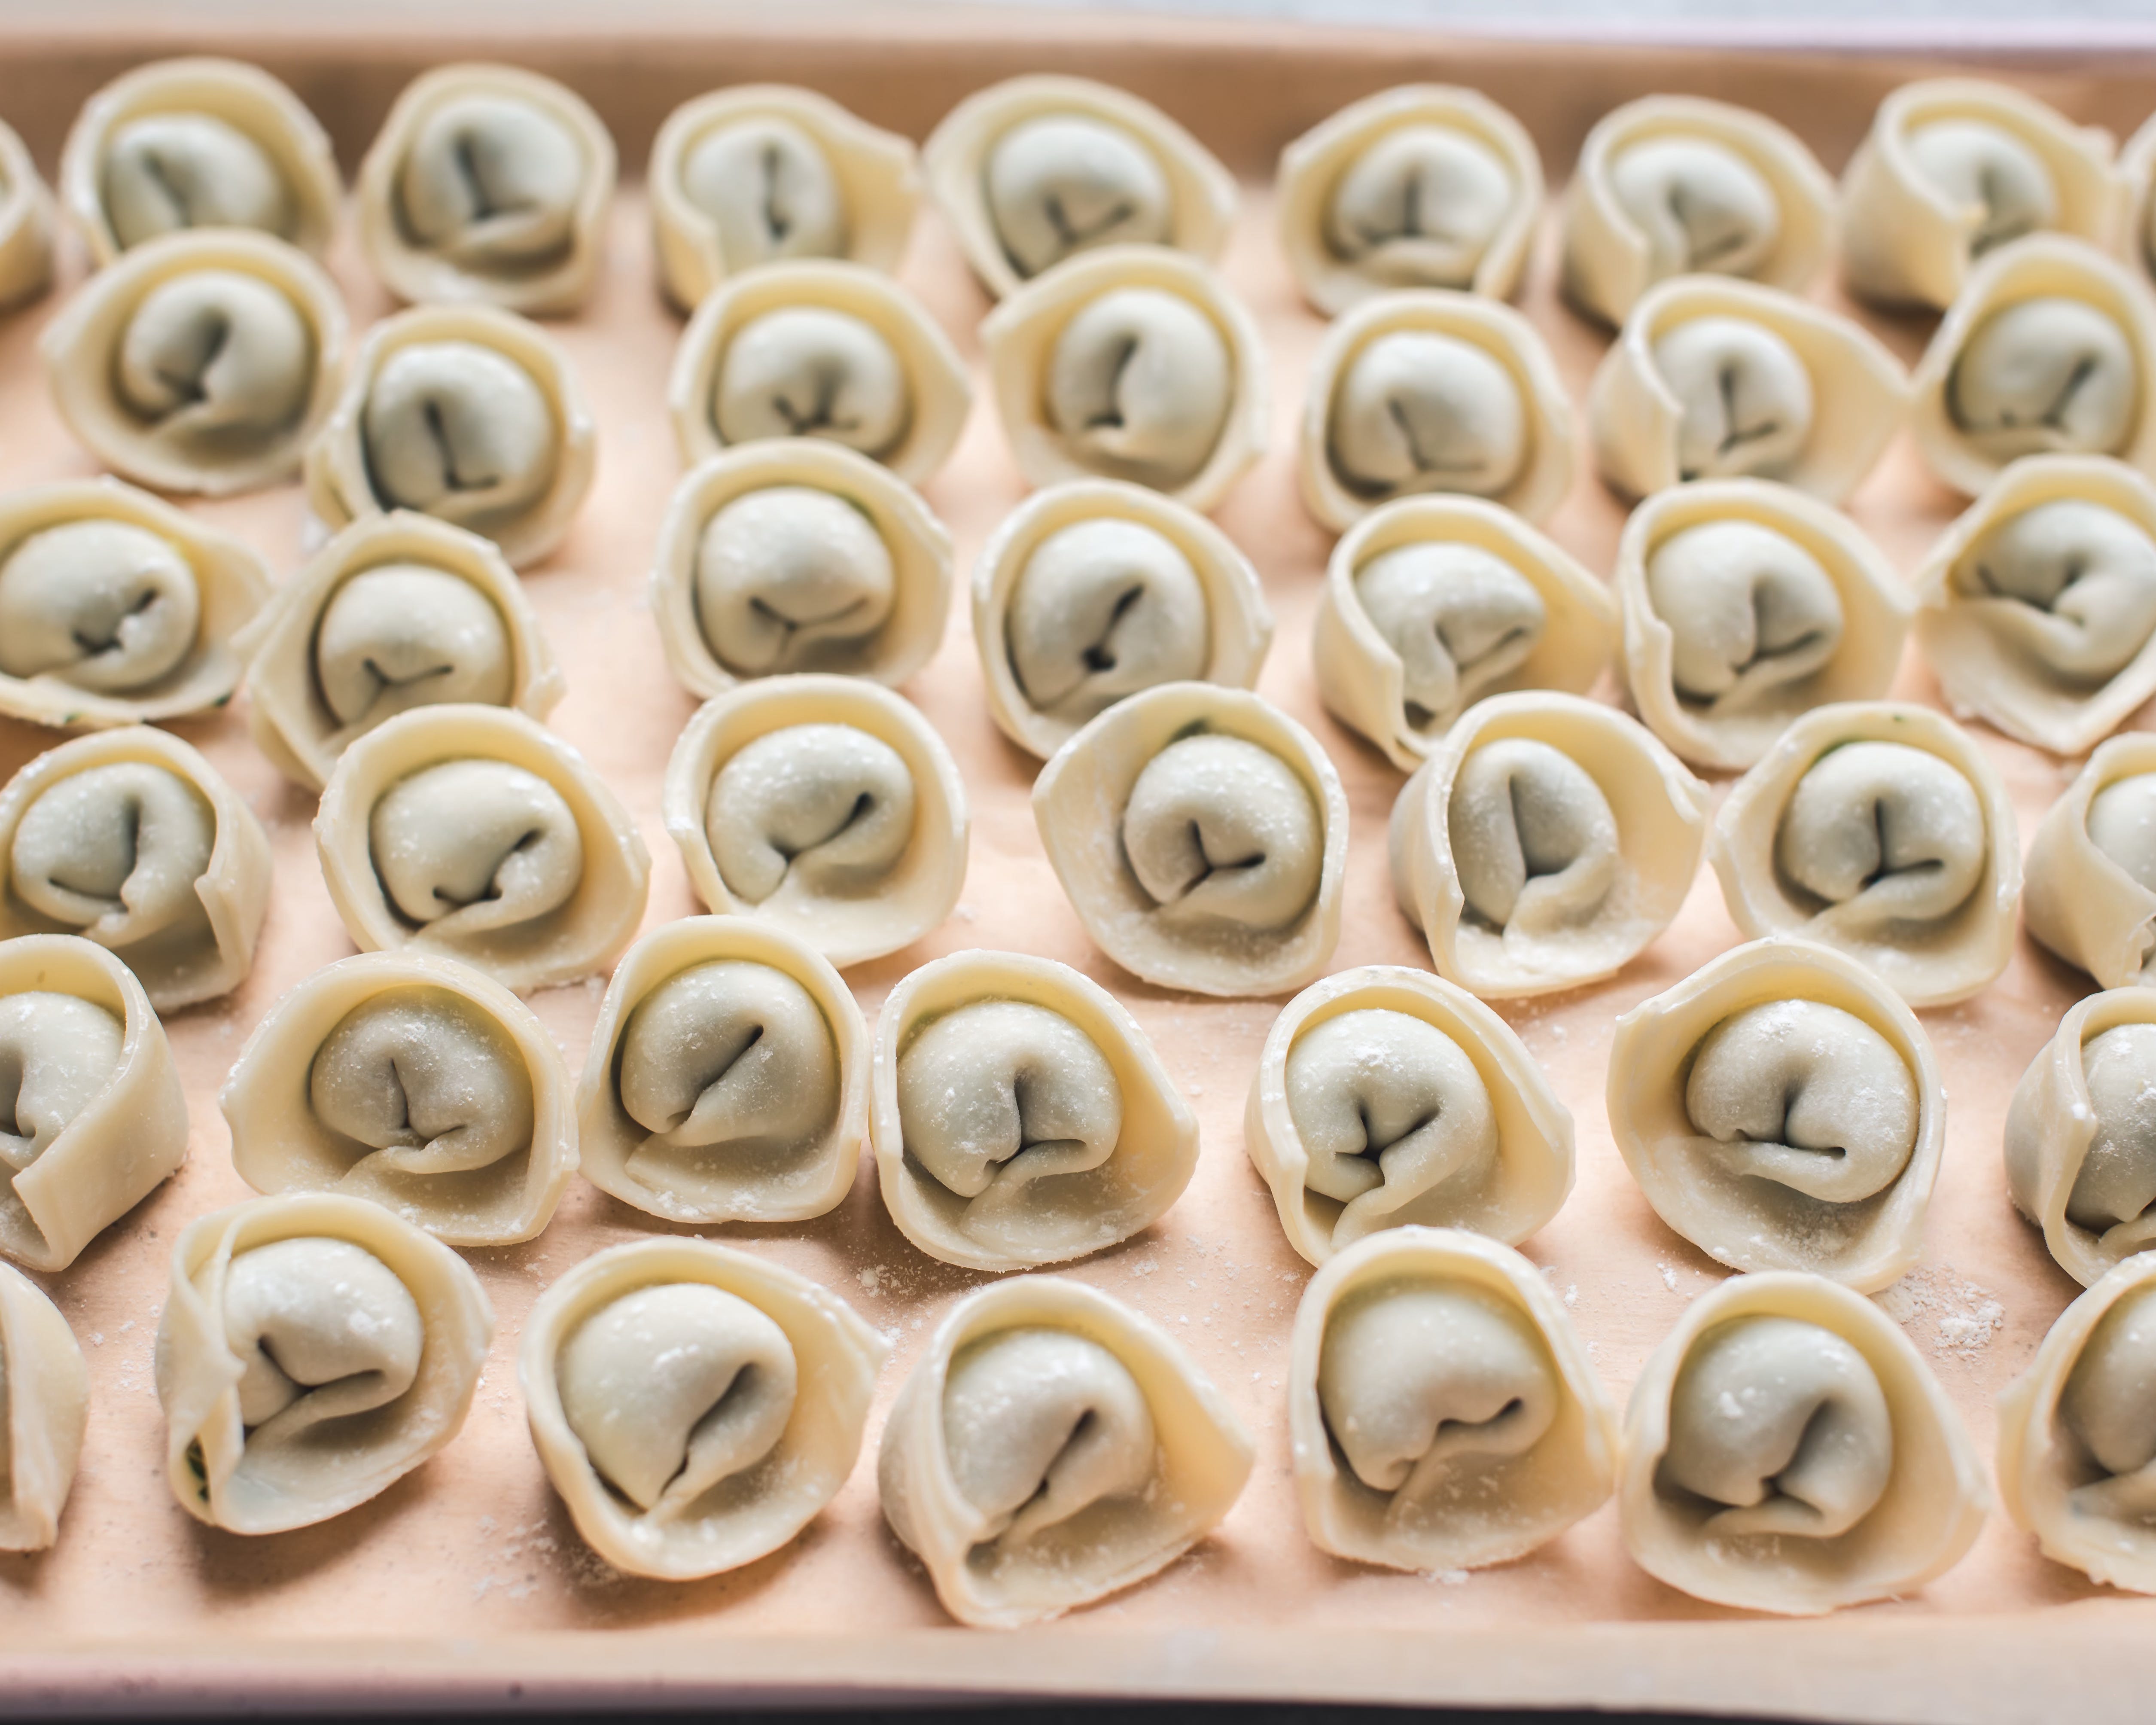
Fill each 3" square wonton wrapper with a heaped 1 tsp to 1.5 teaspoon of filling. Resist the tendency to overfill. The ratio of filling-to-dough affects the overall mouth-feel. Furthermore, an overstuffed wonton will explode as soon as it hits the boiling water during cooking. If you’re using larger wonton wrappers (more than 3” square), place more filling while maintaining the approximate ratio as you see in the blog post images.
STEPS 1-6 CORRESPOND TO STEP-BY-STEP PHOTOS ON THE SITE: (1) Place the filling in the center of the wonton wrapper (2) Fold halfway up, and very gently squeeze around the filling to secure it (3) Curl the wrapper horizontally halfway and (4) begin pulling the lower two corners towards each other (5) Dab a bit of cold water onto the corner parts that will touch (i.e. the bottom of the left corner + top of the right corner) and overlap them (6) Gently squeeze the overlapped corners to stick them together.
Voila! One down, 99 more to go. There are other ways to fold wontons with square wrappers but this is how we do it!
To cook fresh dumplings right away:
BOILING METHOD: To cook the fresh wontons, bring a large pot of water to a boil. Once at a rolling boil, slide the wontons into the pot carefully so as not to scald yourself. Avoid overcrowding the pot - you may need to cook in several batches. Boil until the wontons bob up to the top, about 1-2 minutes. Pour in about a cup of cold tap water and wait for it to return to a rolling boil, about 45-60 seconds. For fresh (not frozen) dumplings, filling should be cooked by now. Drain or scoop out with a long-handled strainer.
PANFRYING METHOD: Drizzle 1 tbsp oil into 10-11” non-stick skillet (it’s important that it be non-stick for this). Arrange dumplings in concentric circles in the pan, not touching. Pour 1 cup cold tap water all over the dumplings. Cover and turn heat to medium-high. Cook until water reaches a rolling boil and most of the water has evaporated (about 6-7 minutes). Reduce heat to medium and continue cooking until dumpling bottoms are golden and crispy. Serve right away.
Tip: If you're ever unsure whether a dumpling is cooked, cut one in half to check if raw meat is no longer pink OR insert an instant read thermometer into the centre of the filling to confirm it is at least 165f (74c).
Options for serving:
We enjoy them simply boiled like this, with a dipping sauce (see Dipping Sauce ingredients) or serve the boiled wontons in homemade chicken broth which is the ultimate cozy meal on a wintry night. OR when we haven’t gobbled them up too quickly, we let them stand 10-15 minutes after boiling to dry out slightly, then panfry on a skillet in a bit oil, until golden brown on the edges. I love any and all of these options!
To freeze dumplings (and cook from frozen):
At this point the wontons can be frozen enjoy another day. Place them in a single layer, not touching, on a baking sheet lined with parchment and put into the freezer for an hour or so. Transfer them into a freezer bag or container.
To boil from frozen: Do not defrost. Place frozen wontons directly into boiling water and follow the same method as Cooking Wontons Right Away (above). It will take a little longer for them to bob to the top. Add the cup of cold tap water and bring it back to a boil. Repeat with another cup of tap water and bring back to a boil. Dumplings should be done.
To panfry from frozen: Follow the same instructions above for cooking fresh dumplings, adding 2-3 more minutes to total cooking time. If unsure, cut one in half to check that filling is piping hot and meat is no longer pink.
Tip: If you're ever unsure whether a dumpling is cooked, cut one in half to check if raw meat is no longer pink OR insert an instant read thermometer into the centre of the filling to confirm it is at least 165f (74c).